As the demand for imaging quality continues to rise in the market, high-precision optical aspheric lenses are increasingly being used in optical instruments, space laser communication, aerospace, and other fields. Compared to traditional spherical lenses, aspheric lenses are designed with varying radii of curvature, allowing the focal points of paraxial and marginal rays to coincide. This reduces optical aberrations such as wavefront aberration, coma, and distortion, effectively correcting spherical image errors. Additionally, aspheric lenses eliminate the need for additional lenses to achieve high imaging quality, facilitating the development of more compact and lightweight optical systems.
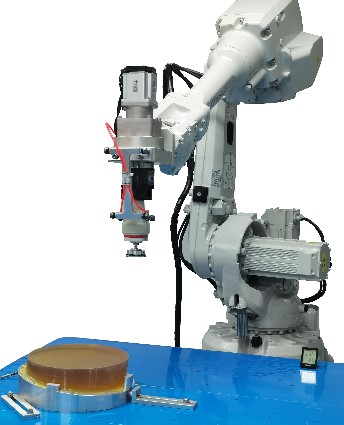
Computer-Controlled Optical Surfacing (CCOS) is an advanced processing technique that combines traditional polishing experience with modern numerical control technology. As the technology has become more refined, it has gradually replaced traditional polishing methods to become the mainstream technology for aspherical lenses processing in China. During actual processing, the surface morphology data of the target workpiece can be pre-input into the control system. Based on the specific polishing environment, key factors such as the dwell time, speed, polishing path, and polishing pressure of the tool head, as well as secondary conditions like the pH value and concentration of the polishing slurry, tool orientation angle, and temperature, are controlled. Through repeated detection and processing, the error between the optical surface accuracy and the target surface accuracy is continuously reduced, ultimately achieving the desired surface accuracy.

Compared to classical polishing techniques, CCOS is a deterministic processing method that can simulate the polishing process of the entire optical surface as accurately as possible, thereby achieving relatively high processing precision. However, due to the small size of the tool head, CCOS also faces the issue of low processing efficiency when polishing large-diameter aspheric lenses. Additionally, as the polishing pad wears over time, the removal function cannot remain consistently stable, which can also impact precision to some extent.
To improve the processing efficiency of small tool heads in the manufacturing of aspheric optical elements, larger tool heads are often used to achieve higher material removal rates, with polishing laps commonly serving as large-sized tool heads. However, due to the poor conformity of larger polishing laps with aspheric optical elements, achieving high-precision processing becomes challenging. To address this issue, scientists have focused on optimizing the tool head (polishing lap) and developed stress lap polishing technology.
Stress lap polishing technology involves the active deformation of the polishing lap to polish the workpiece. Specifically, during the dynamic grinding and polishing process, which includes radial translation and rotation of the stress lap, a computer controls the stress lap in real-time. This control induces dynamic deformation of the lap surface to match the theoretical surface shape of the aspheric being processed. This ensures that during the active lap processing, the polishing lap conforms to the aspheric surface, allowing for more stable material removal and higher precision.

Compared to CCOS technology, stress lap polishing technology offers higher processing efficiency and can preferentially remove surface high points, effectively correcting local mid-to-high frequency errors. This results in a naturally smooth mirror surface over a wide range of spatial frequencies, making it particularly suitable for processing large-diameter aspheric optics. It has become one of the primary technologies for efficiently and accurately processing primary mirrors of 2-meter, 4-meter, and even 8-meter sizes. However, the need to adjust actuators to change bending moments and torques to ensure the stress lap remains in contact with the workpiece surface makes the control process more complex.
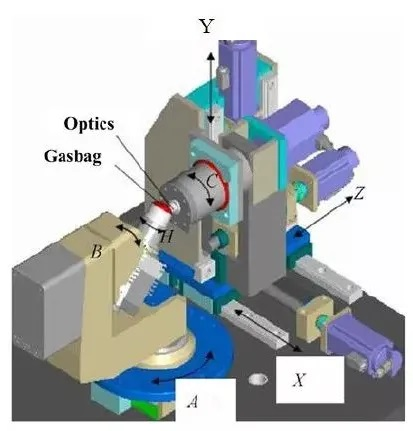
Airbag polishing still employs the basic shape correction theory of CCOS, but uses a polishing tool head that consists of a flexible airbag with a certain pressure and a layer of polyurethane polishing pad adhered to its surface. During polishing, the internal air pressure of the airbag can be adjusted in real-time according to the size and shape of the optical element being polished. This ensures that the polishing tool head almost completely conforms to the surface of the workpiece, guaranteeing that the removal function in the local polishing area of the optical element is consistent. This effectively improves surface roughness and controls the post-processing surface accuracy.
Additionally, the entire airbag polishing process is controlled by a CNC system. The polishing is performed in a “precession” manner (similar to the motion of a gyroscope) along a set path with controlled speed and pressure. The parameters are flexible and controllable, ensuring the stability of material removal during the polishing process.

Currently, in the processing of lithography objective lenses, airbag polishing technology has become the mainstream pre-processing technique before ion beam polishing. However, due to the small polishing spot size and low material removal rate of airbag polishing, the processing time required for large-diameter aspheric surfaces (meter-scale and above) is very long. Additionally, it is prone to generating mid-to-high frequency errors.
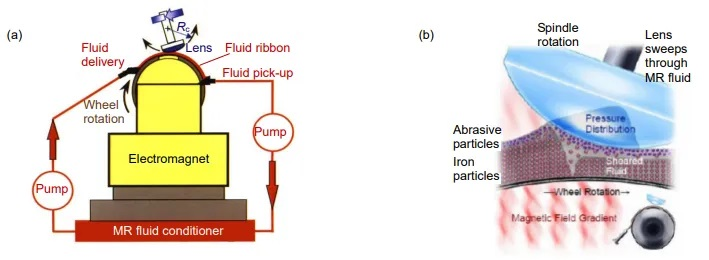
Magnetorheological polishing (MRP) is an advanced processing technology that integrates theories from electromagnetism, analytical chemistry, and fluid dynamics. Its “polishing tool head” is a magnetorheological fluid that undergoes rheological changes in a gradient magnetic field, forming a “flexible polishing mold” with viscoplastic properties. Both the shape and hardness of this mold can be controlled in real-time by the magnetic field.
During polishing, the “tool head” formed by the magnetorheological fluid generates shear forces in the contact area. By adjusting the rotation angle and speed of the workpiece, uniform material removal can be achieved across the surface, resulting in a smooth finish. This technology allows for precise control over the polishing process, making it suitable for achieving high-quality surfaces on complex optical components.

Compared to traditional processing methods, magnetorheological polishing (MRP) offers several advantages. By adjusting the magnetic field strength, the shape and hardness of the solidified magnetorheological fluid can be altered, enabling precise and quantitative material removal from optical elements with high polishing efficiency. Additionally, the surface of the optical element being processed does not deform with changes in stress, preventing the formation of subsurface damage layers and ensuring high surface quality.
Moreover, since the polishing head formed by the magnetorheological fluid does not experience wear, the removal function remains consistently continuous. However, MRP is only suitable for convex surfaces with any radius of curvature. For concave surfaces, the radius of curvature must be larger than the radius of the polishing wheel.
Currently, the American company QED has developed MRP equipment capable of processing diameters ranging from 2 meters to 4 meters. This equipment is already being used for the high-precision processing of large-diameter astronomical aspheric mirrors.
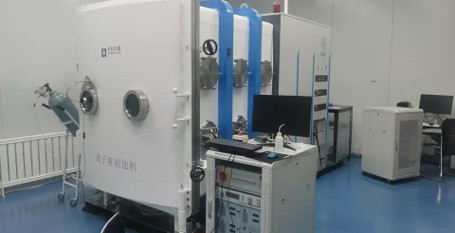
Ion beam polishing (IBP) achieves stress-free, non-contact polishing at the atomic level. The principle involves using an ion source to emit an ion beam with specific energy and spatial distribution to bombard the surface of optical lenses in a vacuum environment. When the atoms on the optical surface receive sufficient energy, they overcome surface binding forces and undergo physical sputtering, thereby achieving atomic-level polishing.

This technique allows for extremely precise material removal, making it ideal for applications requiring ultra-smooth and highly accurate surfaces. The non-contact nature of ion beam polishing eliminates the risk of introducing mechanical stresses or deformations, ensuring the integrity of the optical surface.
Due to its high polishing precision, absence of subsurface damage, and high stability, ion beam polishing (IBP) is highly regarded in the optical processing field. It does not suffer from edge effects or surface and subsurface damage issues. Alongside magnetorheological polishing (MRP), IBP is considered one of the most innovative technologies in optical processing over the past thirty years.
However, as an atomic-level polishing technique, IBP has a relatively low material removal rate. It is particularly suitable for achieving the final high-precision surface requirements of large-diameter aspheric mirrors. Currently, using ion beam polishing to manufacture aspheric surfaces for lithography objective lenses can achieve a surface accuracy with an RMS (Root Mean Square) value of up to 1 nm. This level of precision is critical for advanced optical applications, ensuring the highest quality and performance of the optical components.