Computer-generated holograms (CGH) are used to convert the standard spherical wavefront produced by an interferometer into an aspheric or freeform wavefront that matches the optical design of the element being tested (Figure 1). This enables high-precision surface shape testing and is currently the primary method for nanometer-precision testing of ultra-large-diameter aspheric mirrors.

To overcome the limitations of aperture size, a CGH measurement accuracy calibration method based on equivalent elements has been developed. By simulating the propagation process of the aspheric wavefront, a small-diameter equivalent element (with a diameter reduced by approximately one order of magnitude) is designed. This element is made to be completely equivalent to the ultra-large-diameter aspheric mirror in an autocollimation measurement setup. Subsequently, the aspheric wavefront reference transmitted by the small-diameter, high-precision profile-detection equivalent element is used to solve the accuracy calibration problem of the CGH compensating element for ultra-large-diameter aspheric mirrors.
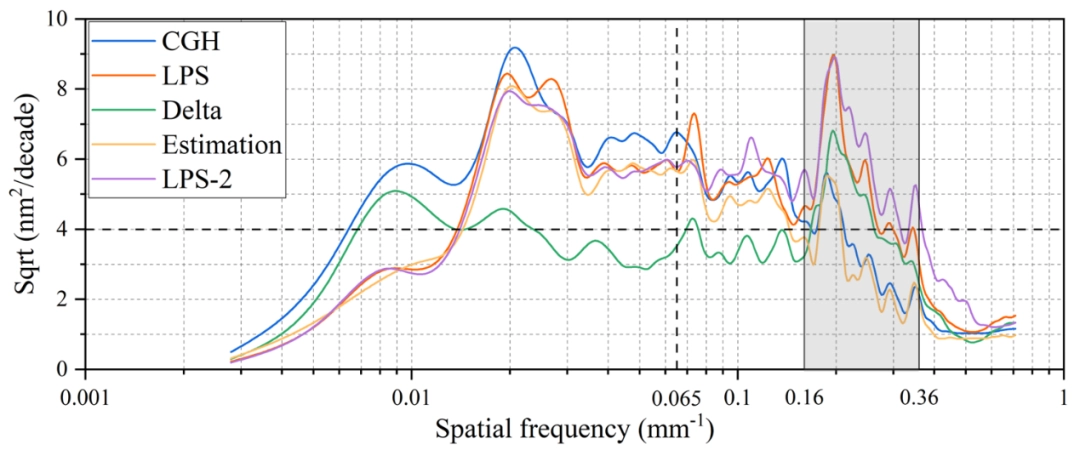
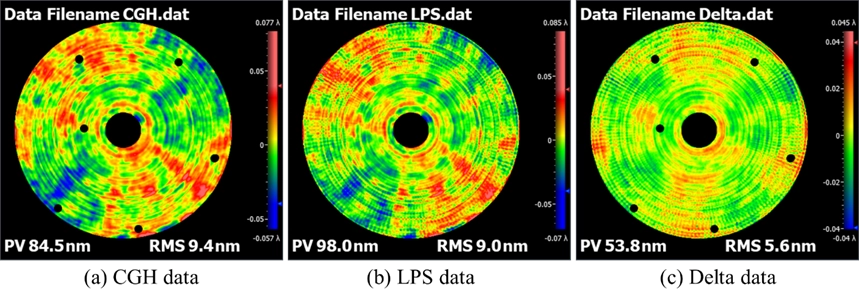
To verify the effectiveness of the aforementioned CGH accuracy calibration method, the research team designed and manufactured an equivalent surface element for a 3.5-meter-diameter aspheric mirror, with an effective diameter of 281 mm. The surface accuracy of the equivalent surface element was tested using both the CGH interferometric compensation method and a high-precision profile detection method, with results showing an accuracy better than RMS 10 nm. By comparing the results using low-order surface error Zernike analysis and spatial frequency domain analysis, the consistency of the results was verified. The actual surface error estimation based on the orthogonal assumption indicated that the calibration accuracy of the 300 mm diameter CGH compensating element reached 4 nm, with a precision scale ratio of 1.1 ppb.


Bena Optics has rich experience in the inspection of large aperture aspherical mirrors, especially the method of CGH compensated interference inspection.